Contents
Searching for a person
This section covers some basics on the persons view of the database and the different ways the persons can be filtered.
The most straight-forward way of searching for persons is using the search box on the top-left:
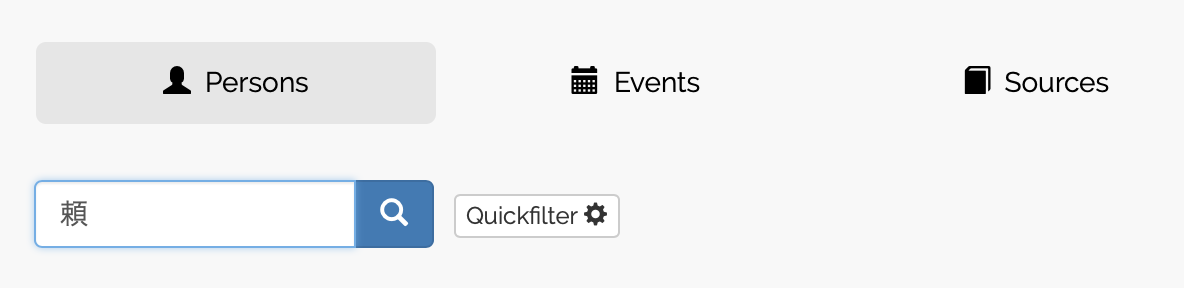
Entering a search term will result in all matching entries to be displayed in the table below. This vanilla search also searches for persons by their alternative names (他名). Persons who are found when the primary names does not, but one of their alternative names does match the search query are marked with an asterisk (*):
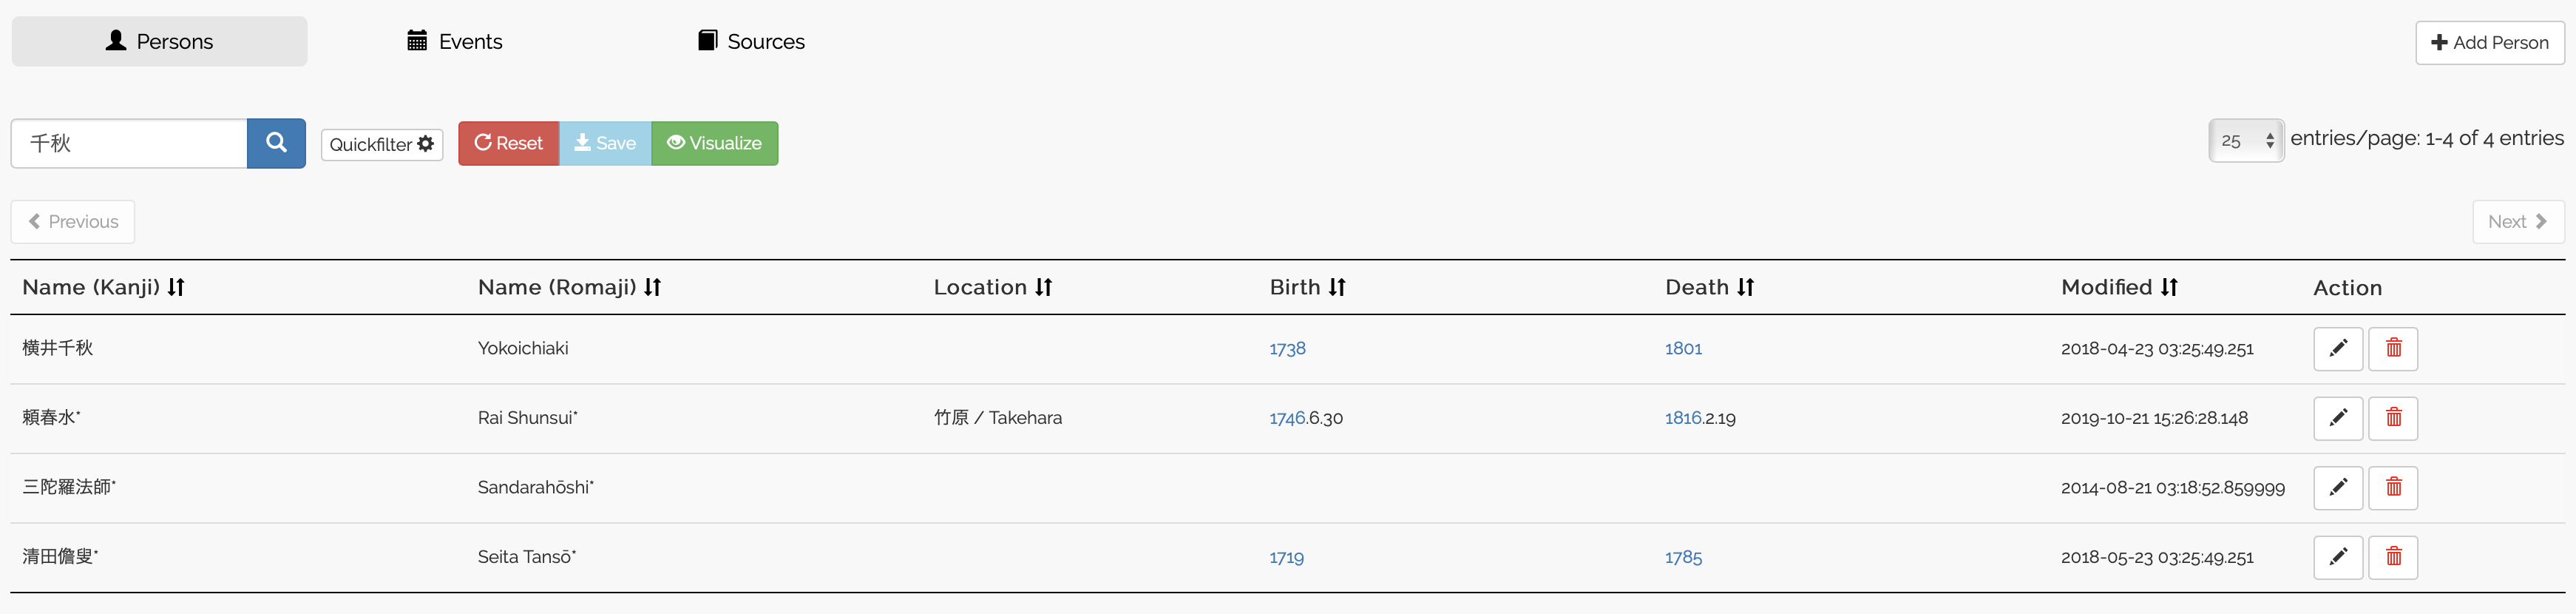
Furthermore, if you enter your query in romaji, the names will be matched in the background with an expanded query. This expanded query accounts for macrons and accents (for European names), so that “Shunpu” will match “頼春風 Rai Shunpū”. The current expansion rules look as follows:
- e -> è | é | ê | e
- o -> ō | o
- u -> ū | u
- c -> ç | c
Important notice
The button “Advanced Search” yields a prototype of a separate search UI that is not implemented well yet. We are currently working on a complete overhaul of the search functionality. In the future, searching capabilities will closely resemble those currently found in the visualization suite (discussed here). This will include fine-grained search by status, occupation, location etc. plus a combination of multiple attributes via AND and OR operators. This enhanced search capability will likely result in dropping the quickfilter in favor of direct access to an “Advanced Search” view.
Adding a new person
This section covers the instructions on how to add a new person entry. We exemplify this tutorial with the fictitious 田中一郎 Tanaka Ichirō.
Make sure you are logged in and are in the persons view of the database. Click the “Add Person” button on the top-right to proceed:

After clicking on it, the empty form for adding a person will be shown:
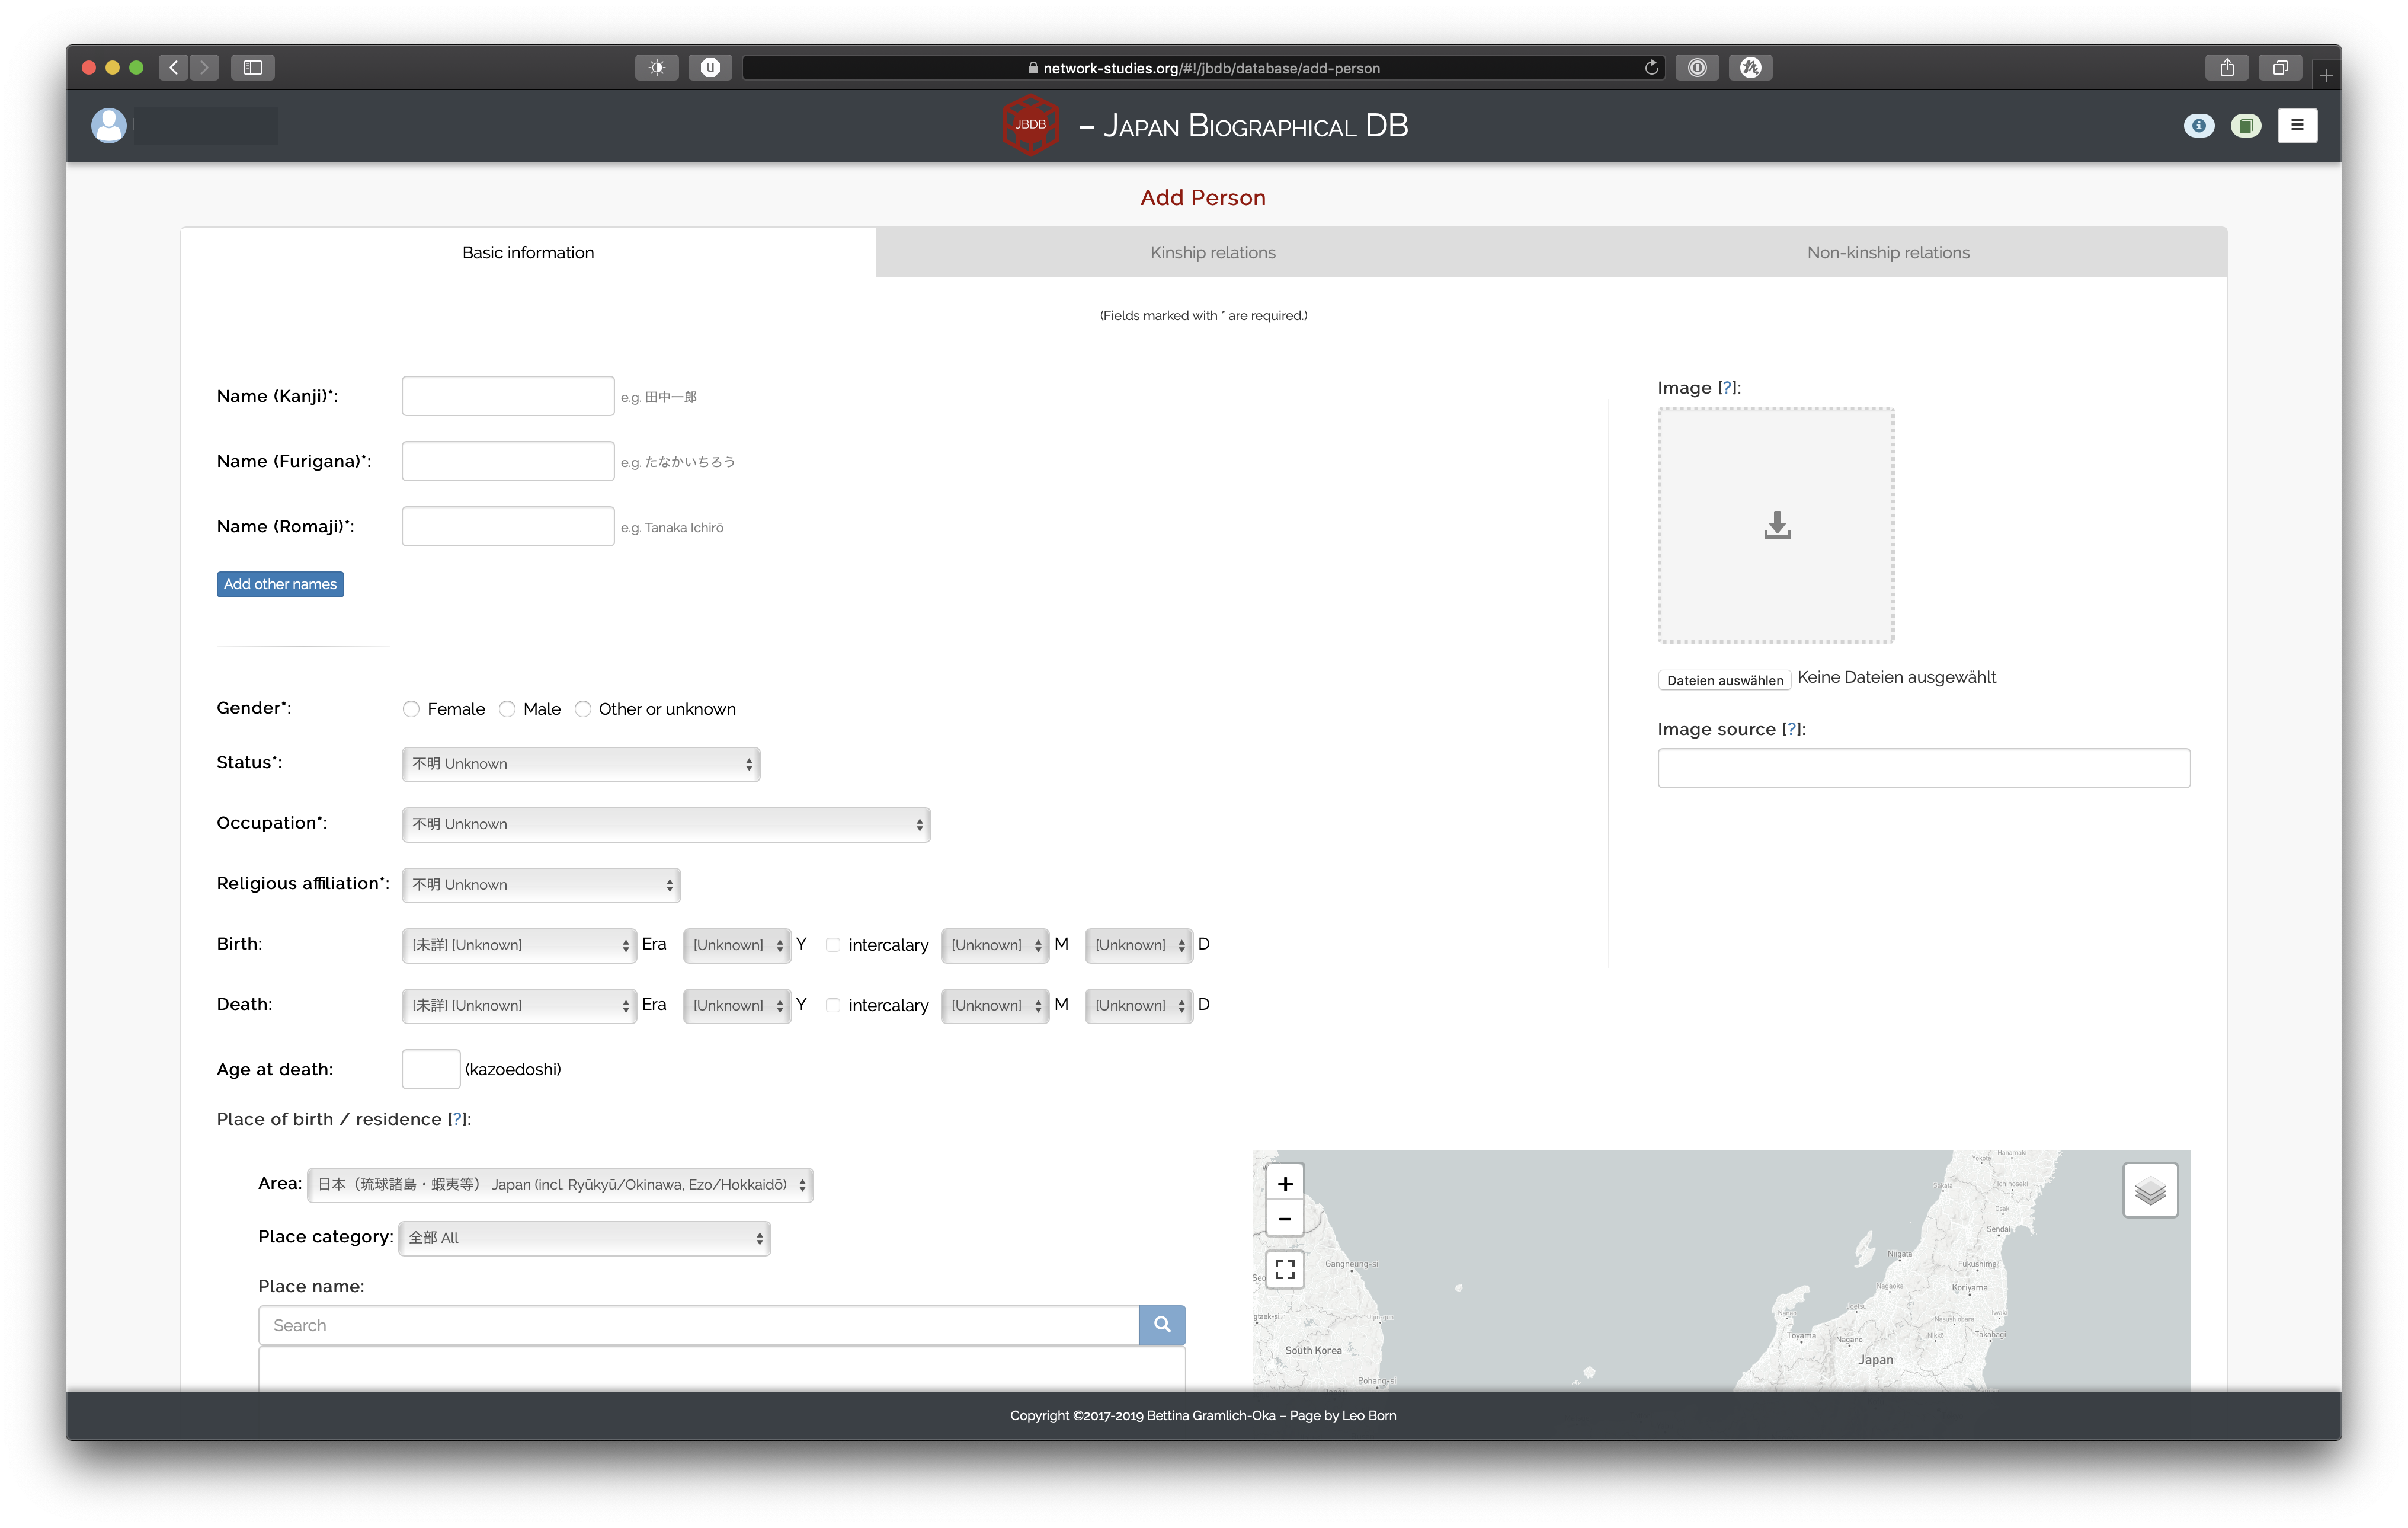
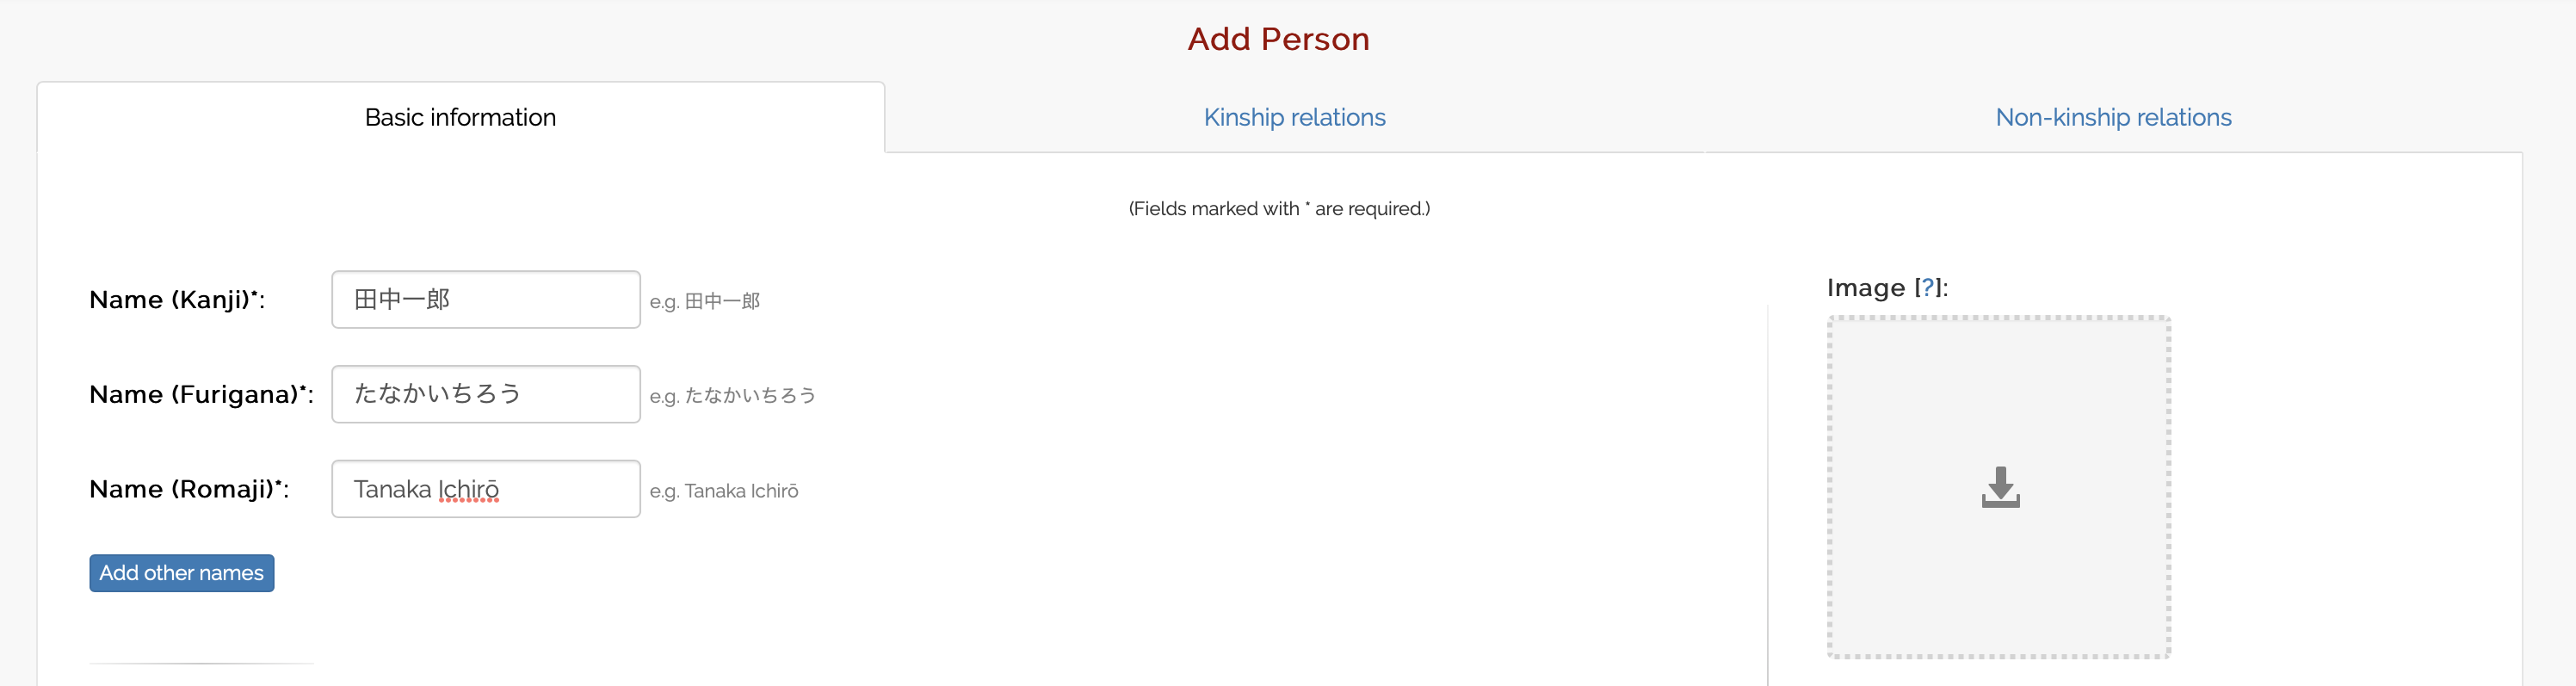
You will notice that the view defaults to the tab “Basic information” and that the remaining tabs, “Kinship relations” and “Non-kinship relations”, are greyed out. This is because the relation tables in those latter views require the name of the person to be given. Therefore, after entering the person’s name, you will find the other tabs to be clickable (indicated by their blue color):1
Before we turn our attention to the kinship and non-kinship relations, however, let us complete the remaining basic information.
Basic information
Names
The name of a person is the minimal information you need to provide in order to create an entry. Note, however, that all basic name information are required, even when a certain variant (e.g. kanji) is not known or applicable. In these cases, it suffices to simply duplicate the name variant that is known. For example, if you enter a person whose name is しず Shizu, but the kanji of that name are not known, simply type しず into the kanji column as well.
After entering the person’s main name in kanji, furigana, and romaji, you can proceed to enter additional names that person was known by. Simply click on the “Add other names” button and the following modal window will appear:
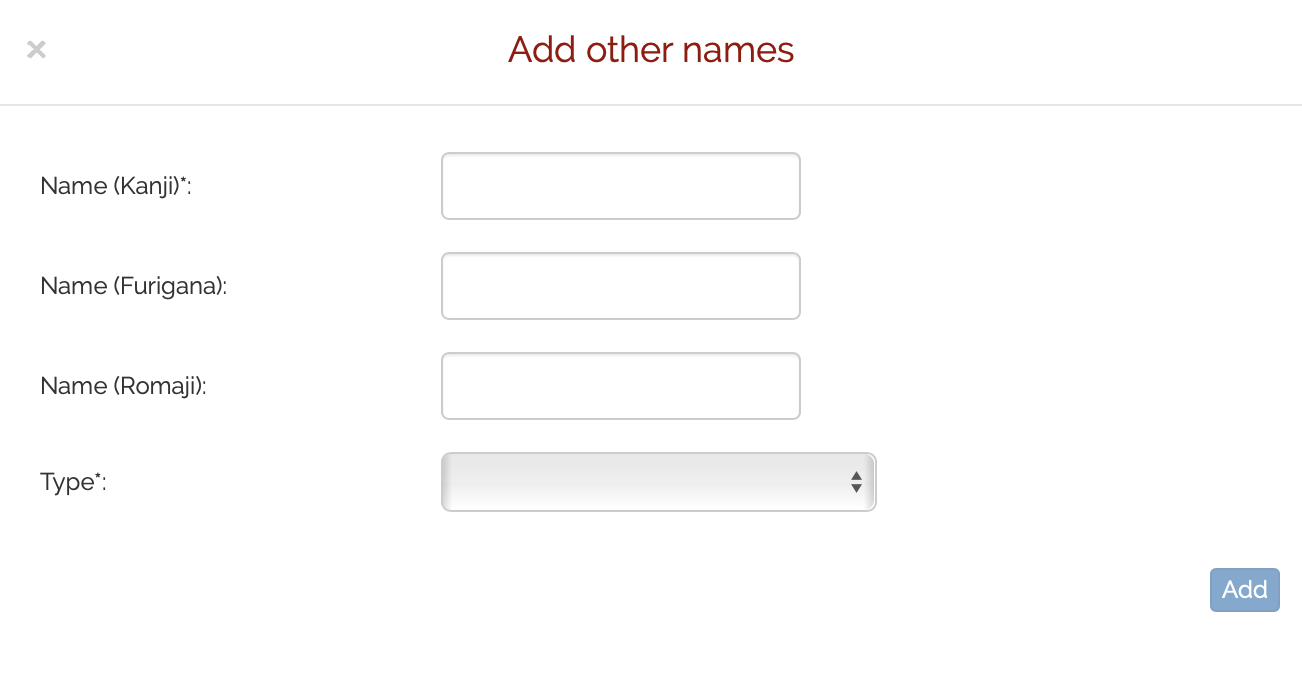
The first three fields are the same as for the person’s main name: the person’s alternative name in kanji, furigana, and romaji. The dropdown allows you to select the type of the alternative name you are entering. The options are as follows:
- 諱 Given name
- 通称 Common name
- 号 Penname/studio name
- 名称 Professional house name
- 他 Other
- 字 Chosen name
- 名 Childhood name
- 官位 Honorary court title and rank
- 法号・法名・戒名 Buddhist name
- 諡 Posthumous name
- 称号 Title
- 職名 Professional title
You can enter as many alternative names as you want. They will be shown in a table below the form:
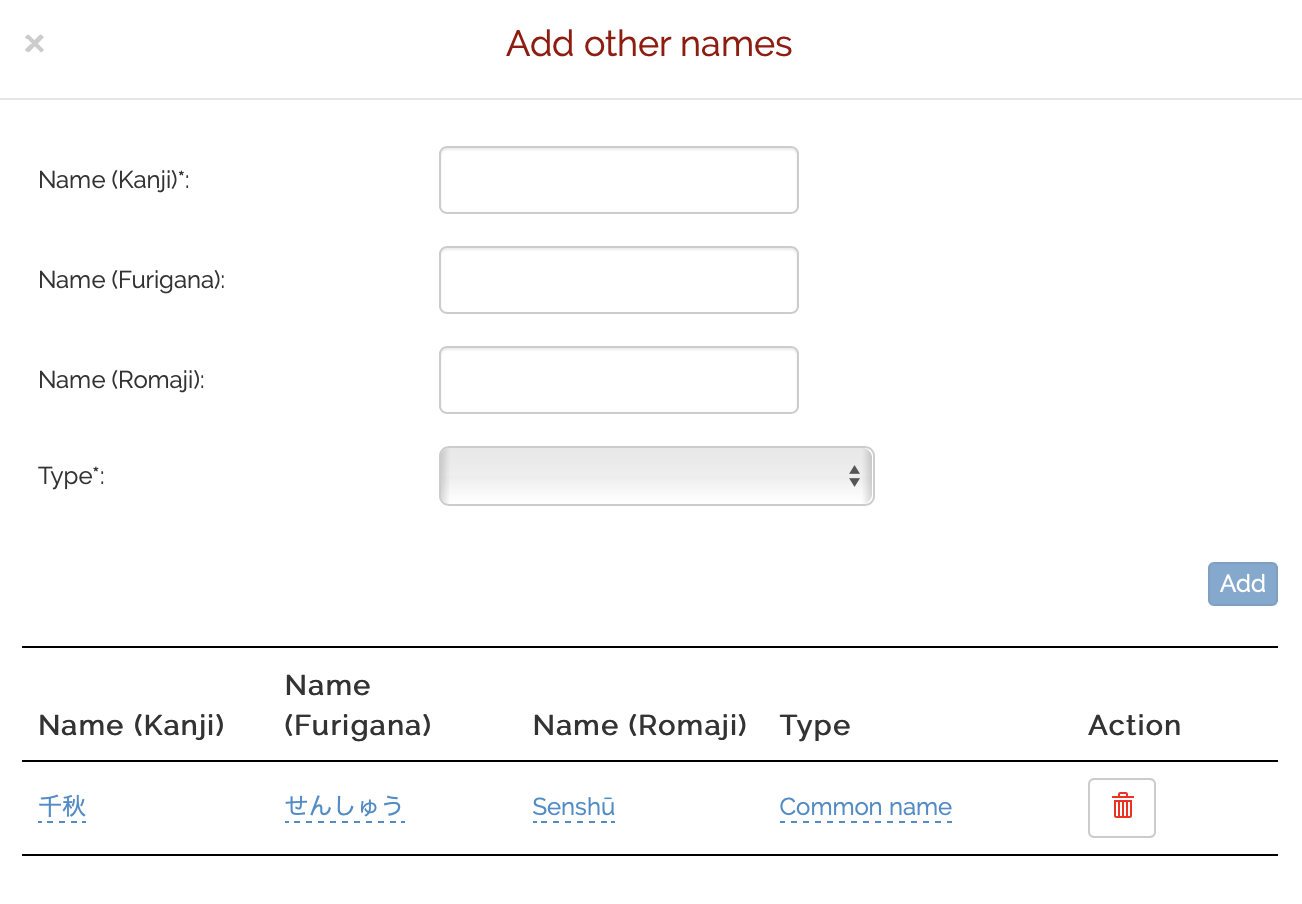
The table allows you to remove or edit any alternative name. By clicking on an underlined cell, you can directly edit any name in the table. Note, however, that in order for edits to be correctly saved, you have to click outside the cell again once you are finished editing.
Once you are done, you can either click the “x” mark on the top-left of the modal window or just click outside of it to close it.
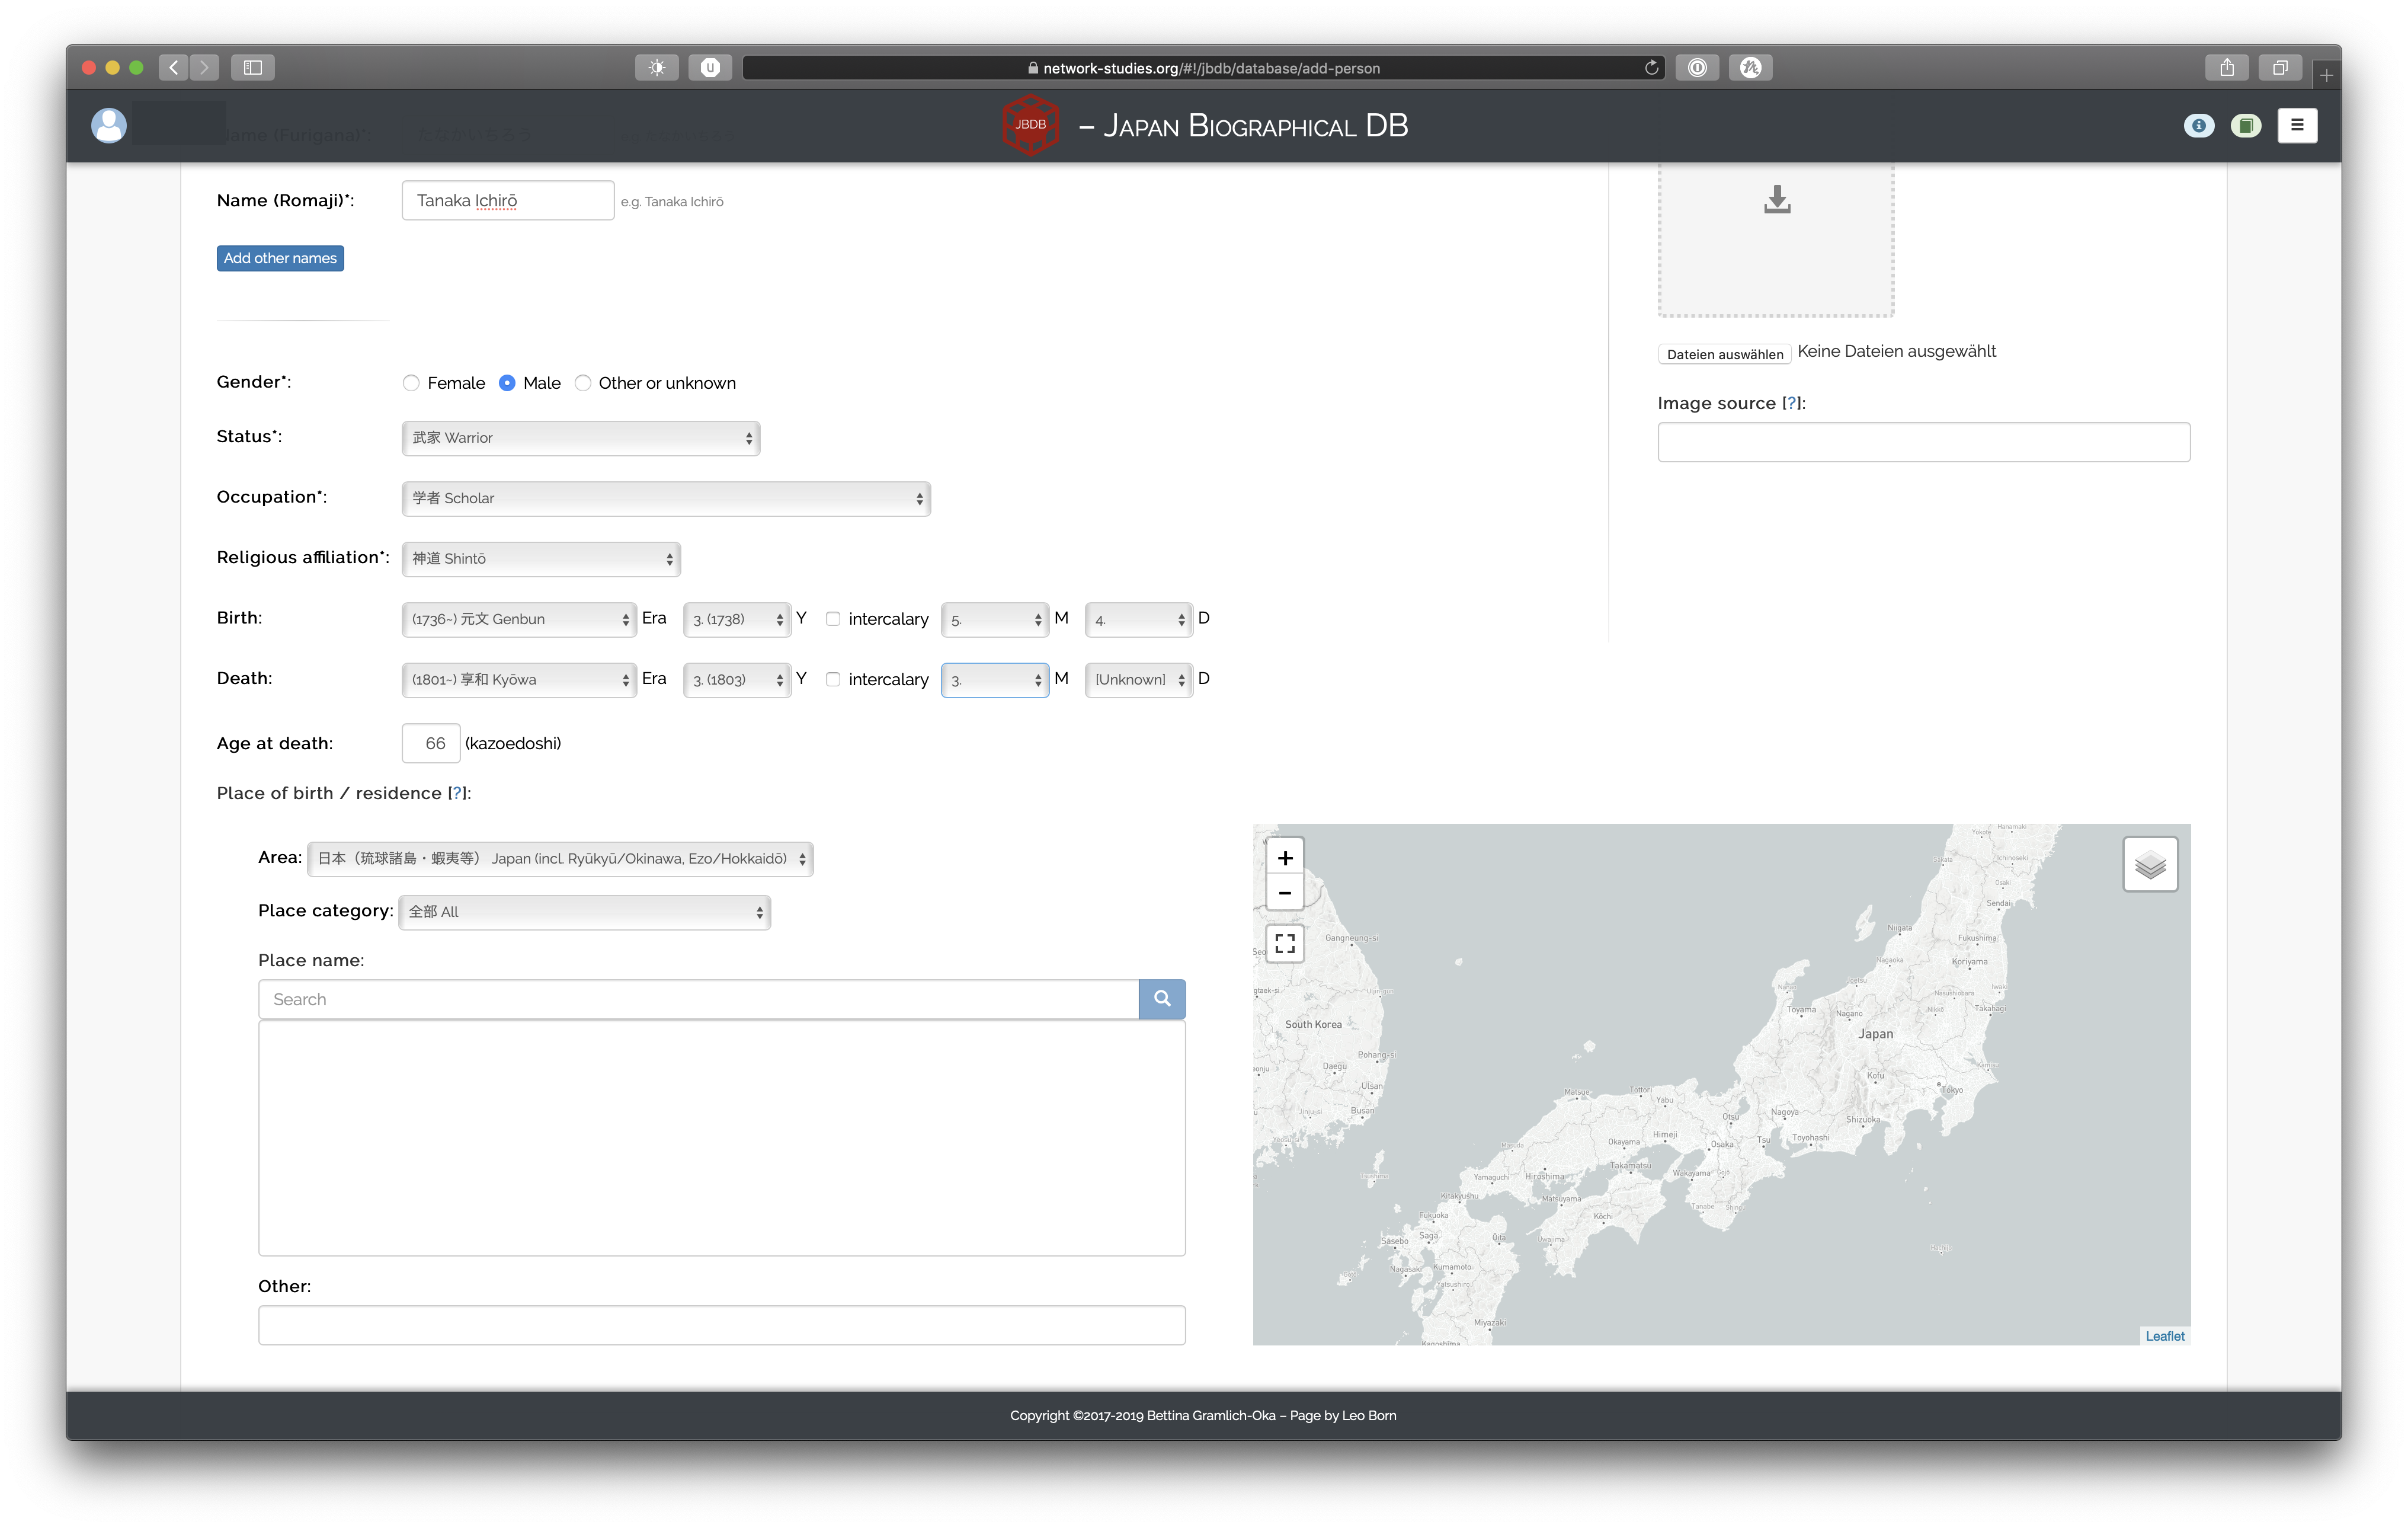
Gender, Status, Occupation, Religion
After that come the other basic information of a person, including gender, status, occupation and religious affiliation.
Statuses (at birth) are displayed in an hierarchical fashion. The top levels of any status category are not selectable. Therefore, the 百姓 Villager category cannot be selected directly, but instead a sub-cateory has to be chosen. The available statuses are:
- 不明 Unknown
- 不明 Unknown
- 公家 Noble house
- 不明 Unknown
- 公卿・公家・貴族 Aristocrat
- 門跡 Aristocratic Buddhist abbot
- 下級官人 Low-ranking court official
- 公家奉公人 Noble house retainer/dependent
- 武家 Warrior house
- 不明 Unknown
- 武家 Warrior
- 家来・家臣 Warrior retainer/vassals/dependent)
- 武家奉公人 Warrior house servant
- 郷士 Rural warrior
- 浪人 Rōnin/other
- 下人、下男、下女 Servant
- 百姓 Villager
- 不明 Unknown
- 村役人 Village official
- 村人・本百姓 Land-owning villager
- 小作人・水呑百姓 Tenant farmer
- 被官百姓 Bound servant
- 下人、下男、下女 Servant
- 町人 Townspeople
- 不明 Unknown
- 町役人 Town official
- 本町人・町衆 Land-owning townspeople
- 借家人 Tenant
- 奉公人 、下人、下男、下女 Servant
- 無宿 Unregistered person
- 宗教者 Religious profession
- 不明 Unknown
- 僧侶 Buddhist cleric
- 神職 Shrine priest
- キリスト教聖職者 Christian cleric
- 修験者 Mountain ascetic
- 民間宗教者 Other religionist
- 他 Others
- 被差別民 Outcast
- 他 Other
The following occupations can be chosen for a person:
- 不明 Unknown
- 農民 Farmer
- 商人 Merchant
- 工人・職人 Artisan
- 学者 Scholar
- 芸人・芸者・遊女 Performing artist/entertainer; incl. sumo, actor, courtesan
- 医者 Physician
- 文学者 Writer/poet
- 芸術家 Visual artist
- 師匠 Teacher, incl. martial arts, shogi/go, tea, military strategy
- 当道座 Member of the guild of blind
- 教員 Teacher
Lastly, religious affiliations are structured hierarchically as well. In contrast to statuses, however, it is possible to select the top-level categories as well. Therefore, the list of available religious affiliations looks like this:
- 不明 Unknown
- トップ・レベル Top level
- キリスト教 Christianity
- 新宗教(日本) Jap. New Religions
- 仏教 Buddhism
- 神道 Shintō
- イスラーム Islam
- ユダヤ教 Judaism
- ヒンドゥー教 Hinduism
- その他 Other
- キリスト教 Christianity
- カトリック Catholic
- プロテスタント Protestant
- 正教会 Orthodox
- その他 Other
- 仏教 Buddhism
- 天台宗 Tendai
- 真言宗 Shingon
- 浄土宗 Pure Land
- 浄土真宗 True Pure Land
- 禅宗 Zen
- 日蓮宗 Nichiren
- その他 Other
Note that status, occupation, and religious affiliation currently do not account for fluidity (e.g. a person changing his/her occupation). We are currently working on ways to adress this in the future.
Birth and Death Dates, Age
The age of a person is automatically determined as soon as at least years are set for both birth and death. Note that we consider the Japanese kazoedoshi 数え年 for age.
Regarding dates, each finer unit is blocked unless the next higher unit has a value other than “[Unknown]”. This means that you will first have to select the era (or 年号) of the date before you can select a year; you have to select a year before you can select a month, and so on. The era list includes starting years (in Western calendar) for each era as a quick pointer.
The intercalary (or 閏) checkbox for dates is intended to be applied to actual intercalary months, not to dates in a year that happen to have an intercalary month. So, for example, if there are two dates, 天保1年3月4日 and 天保1年閏3月4日, the first would be entered by selecting 3月4日 without checking the intercalary checkbox, and only the second one would be selected with checking the intercalary box. It is not meant to be selected by virtue of the year 天保1年 having an intercalary month; the checkbox is supposed to be only selected for one month of that year (namely, the actual intercalary month).
Origin
You can also select either the birthplace of a person or an associated place of residence. Entering this information is a two-step process. First, you have to select the geographical region appropriate for that person:2
- [未詳] [Unknown]
- 日本(琉球諸島・蝦夷等) Japan (incl. Ryūkyū/Okinawa, Ezo/Hokkaidō)
- 中国 China
- 朝鮮・韓国 Korea
- アジア Other Asian countries
- ヨーロッパ Europa
- アメリカ州 Americas
- その他 Other
Depending on the selected region, different places and place categories become available. You can either leave the place category set to the default value of 全部 All or specify a specific sub-category. Just like searching for persons, simply enter a name and select the corresponding place. If multiple results are available, you can check the selected place on the map on the right:
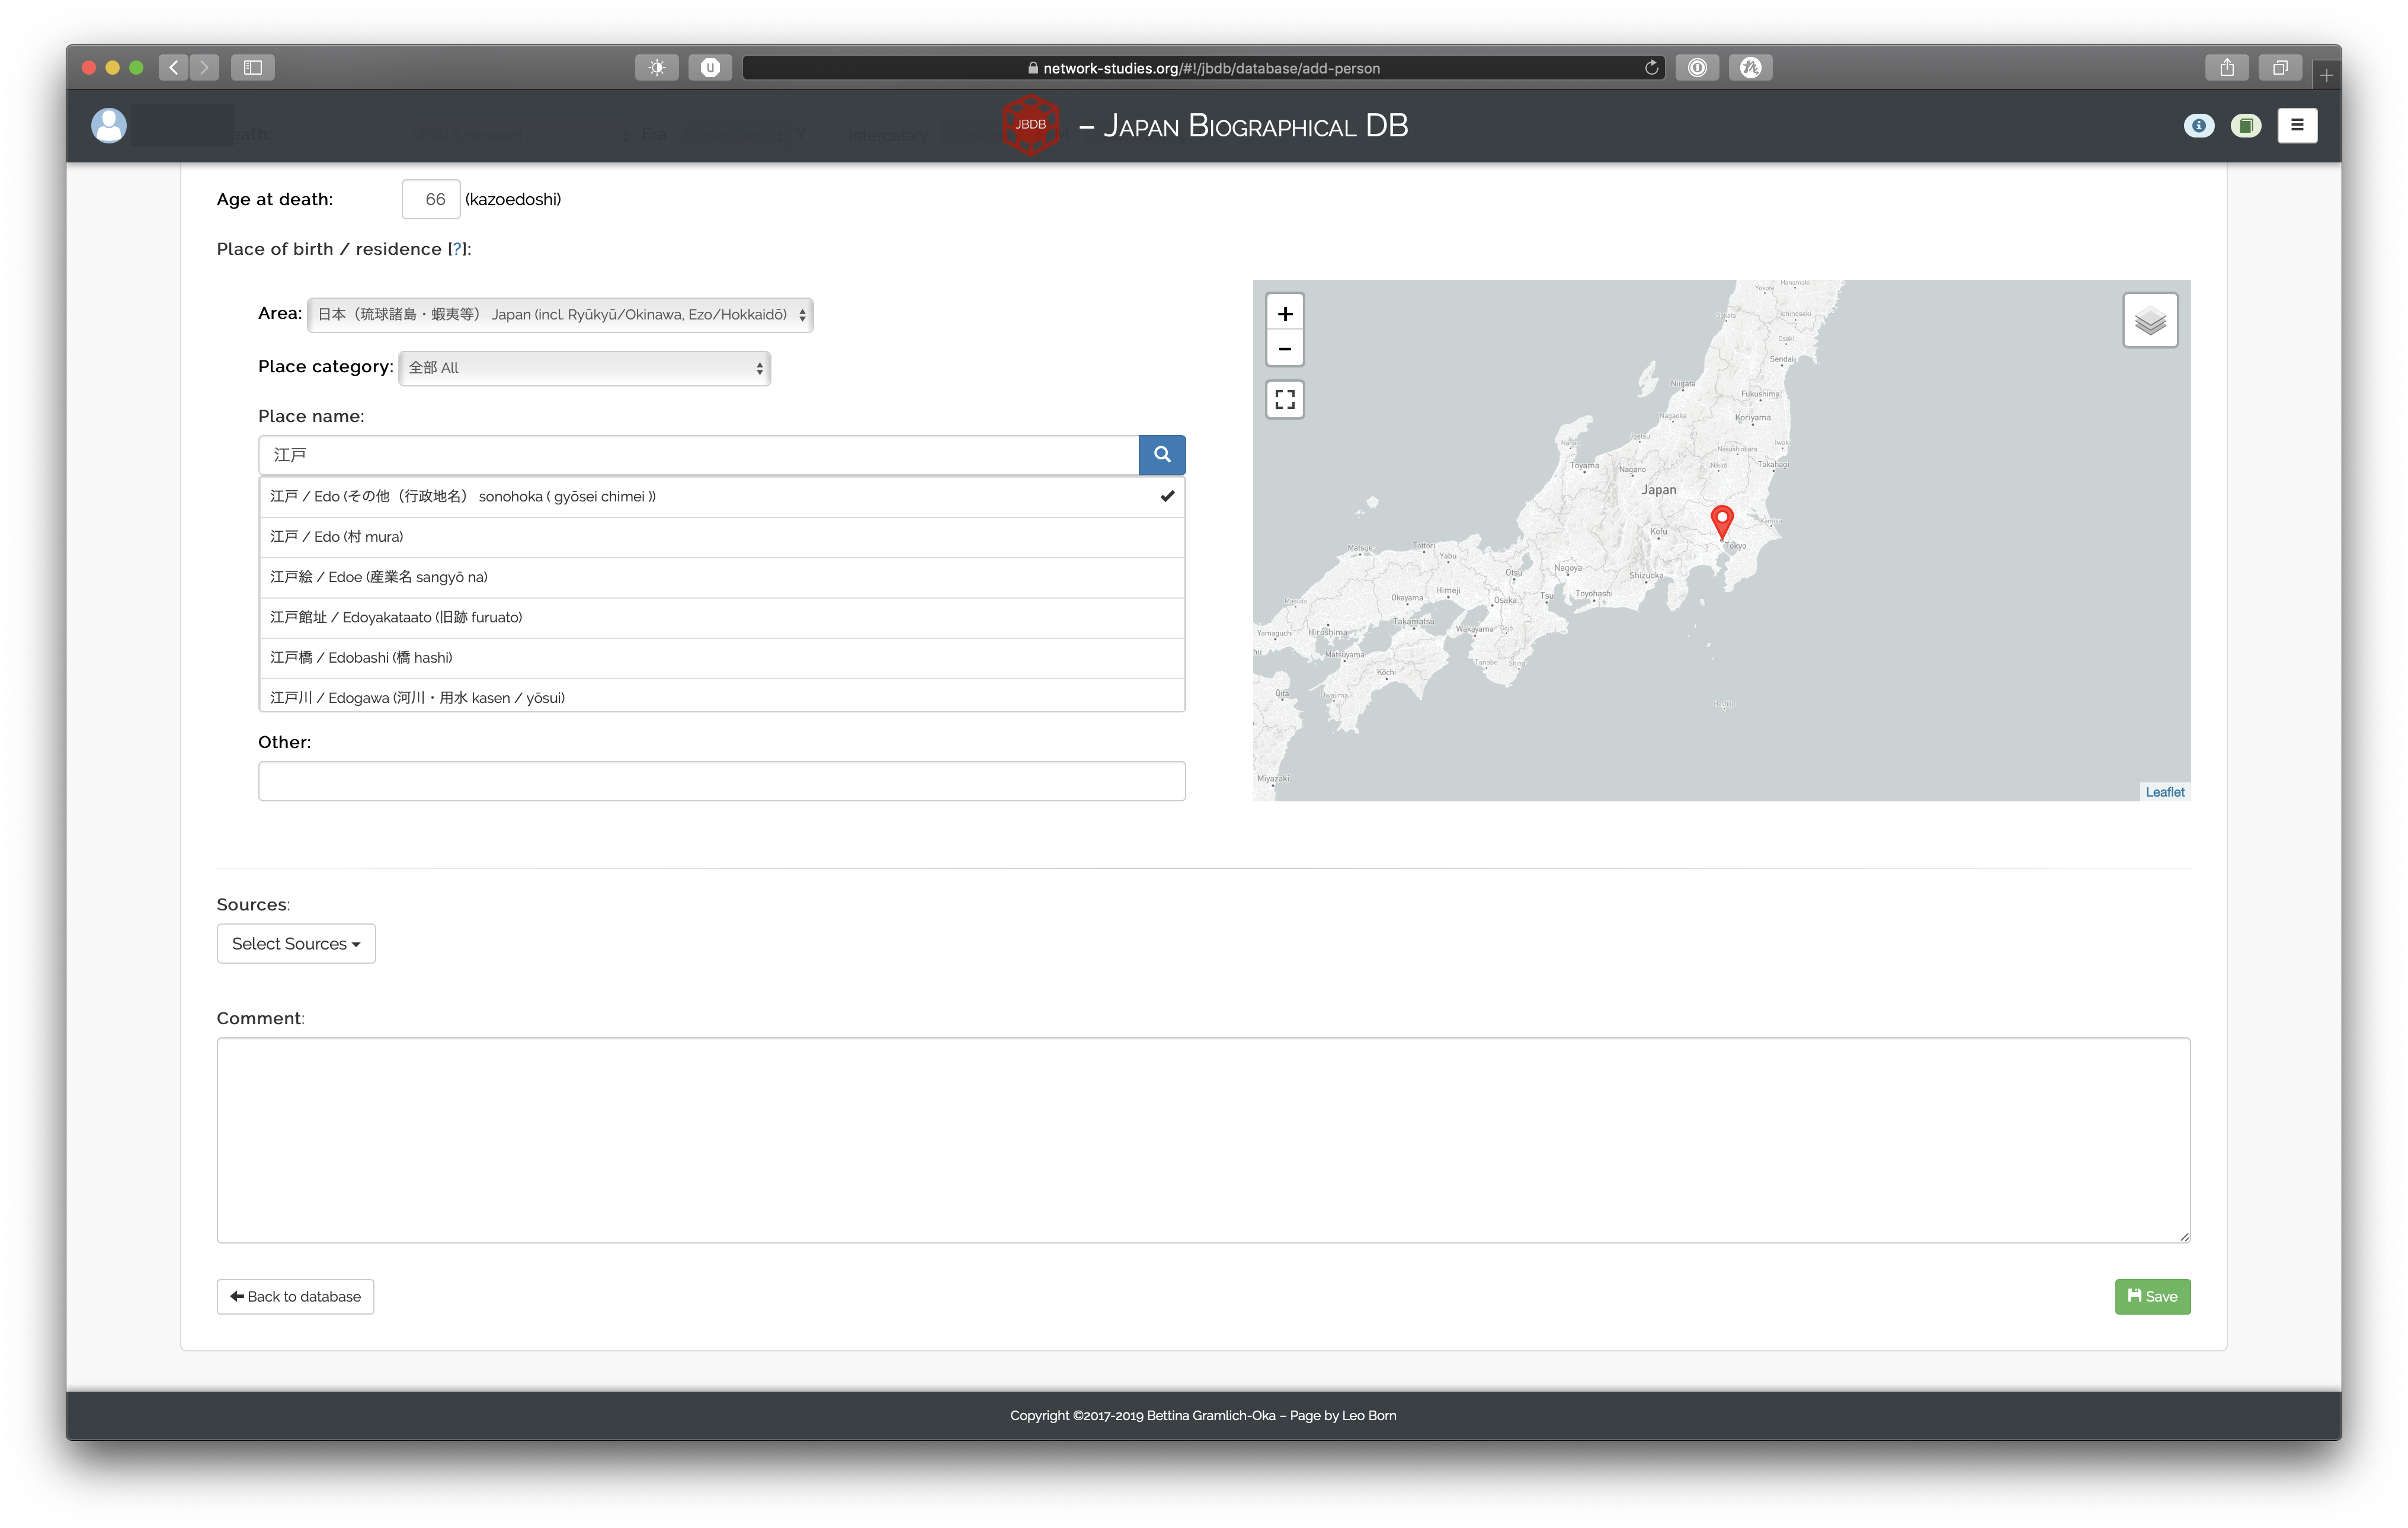
The field “Other” can be used either when a place to be entered cannot be found (in this case, the place won’t be shown on any maps) or if you want to specify the exact address.
Note that the place category selected will not be stored in the database. The place category selection only serves to make searching for places easier. Conversely, the geographical region, the place itself and the field “Other” will be saved in the database.
For Japan, the data we use comes from the 歴史地名データセット. Please refer to their documentation for an overview of available place categories. For the remaining regions, we use the GeoNames gazetteer as of June 2019. Note that this dataset is very large, so searching for a place might take longer than for Japanese places. Furthermore, there will be much more results per query as the regions considered when searching are broader. Lastly, be aware that this does not constitute a historical GIS dataset.
Sources
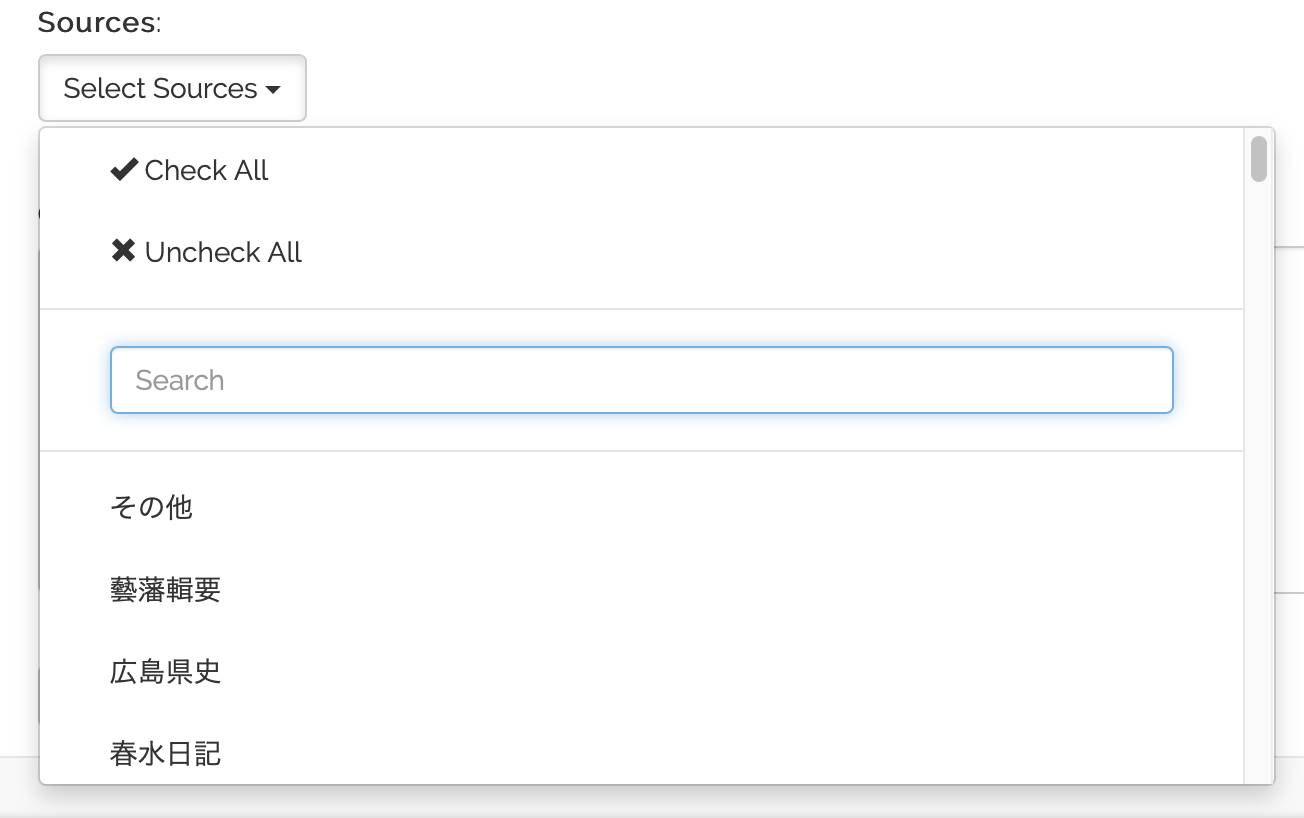
As the last piece of information, please select the source(s) you have used to gather the information on this person. You can search or scroll through the the dropdown of sources to see whether they are already present or not:
If the source(s) you have used is/are not present, please make sure to add a source entry first in the add-source view. You can simply open a new browser tab for that and head to the sources view.3
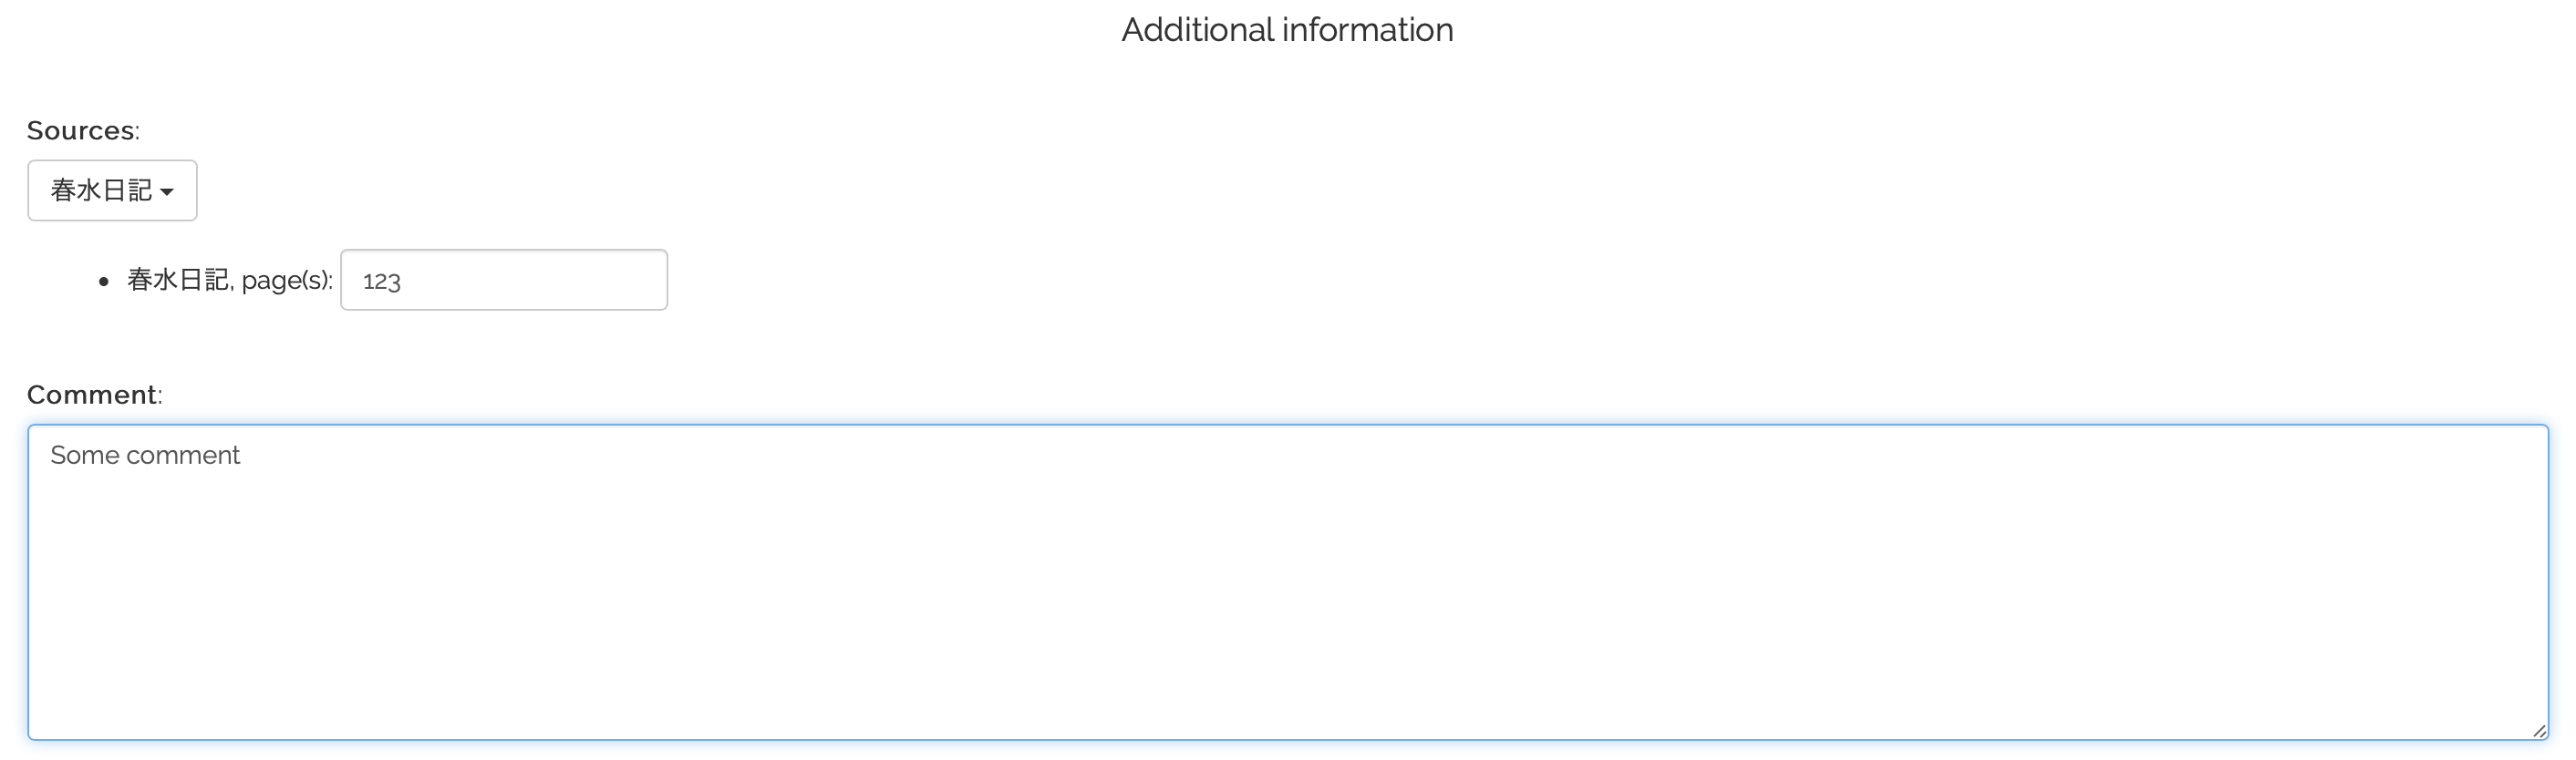
Additionally, you can enter the page numbers of the selected source(s) and a general comment on this person or the entry:
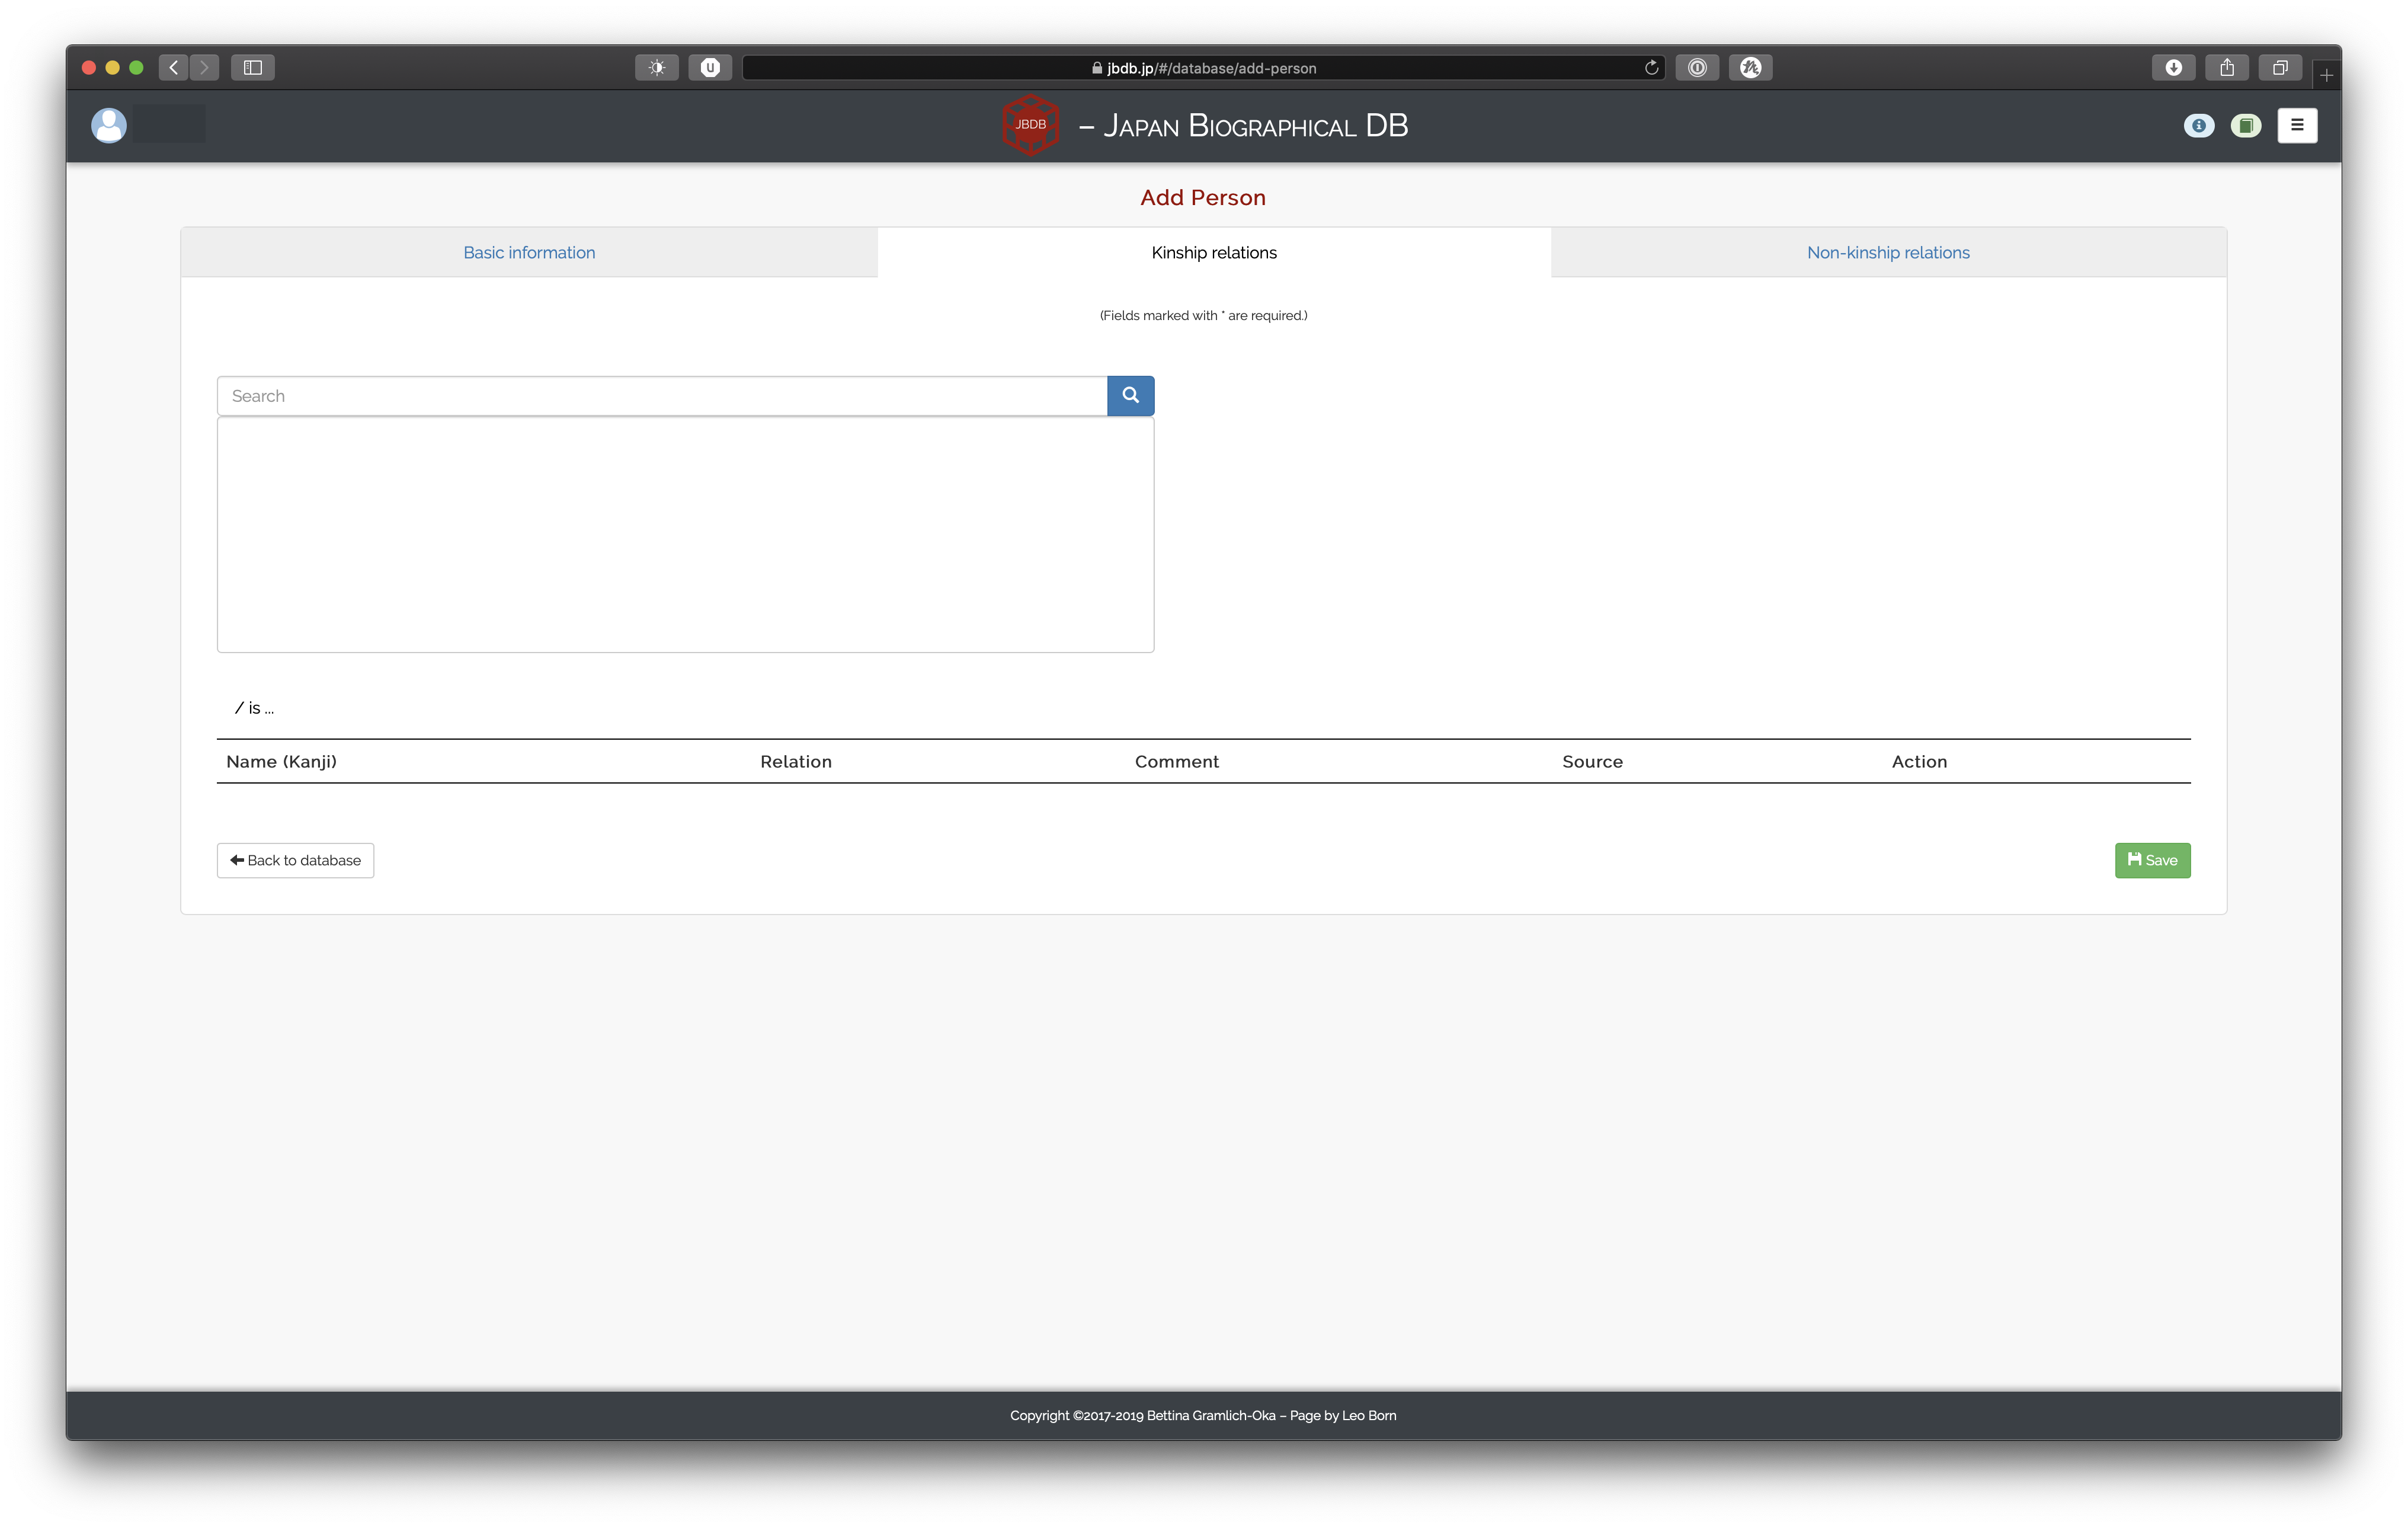
Kinship relations
As we have discussed, kinship relations relations become accessible once a person’s name has been entered. Clicking on the navigational tab “Kinship relations” presents you with a search form and an empty table:
The available kinship relations are as follows:
- の父 father of
- の母 mother of
- の息子 son of
- の娘 daughter of
- の祖父 grandfather of
- の祖母 grandmother of
- の孫息子 grandson of
- の孫娘 granddaughter of
- の兄・弟 brother of
- の姉・妹 sister of
- の妻 wife of
- の夫 husband of
- の義理の息子 son-in-law of
- の義理の娘 daughter-in-law of
- の夫の父 father of husband of
- の妻の父 father of wife of
- の夫の母 mother of husband of
- の妻の母 mother of wife of
- の養父 adoptive father of
- の養母 adoptive mother of
- の養子(男) adopted son of
- の養女 adopted daughter of
- の甥 nephew of
- の姪 niece of
- の叔父・伯父 uncle of
- の叔母・伯母 aunt of
- の後妻 second wife of
- の後夫 second husband of
- の妾 mistress/concubine of
- の主人 master/concubinator of
- の乳母 wet nurse of
- の乳母子 wet child of
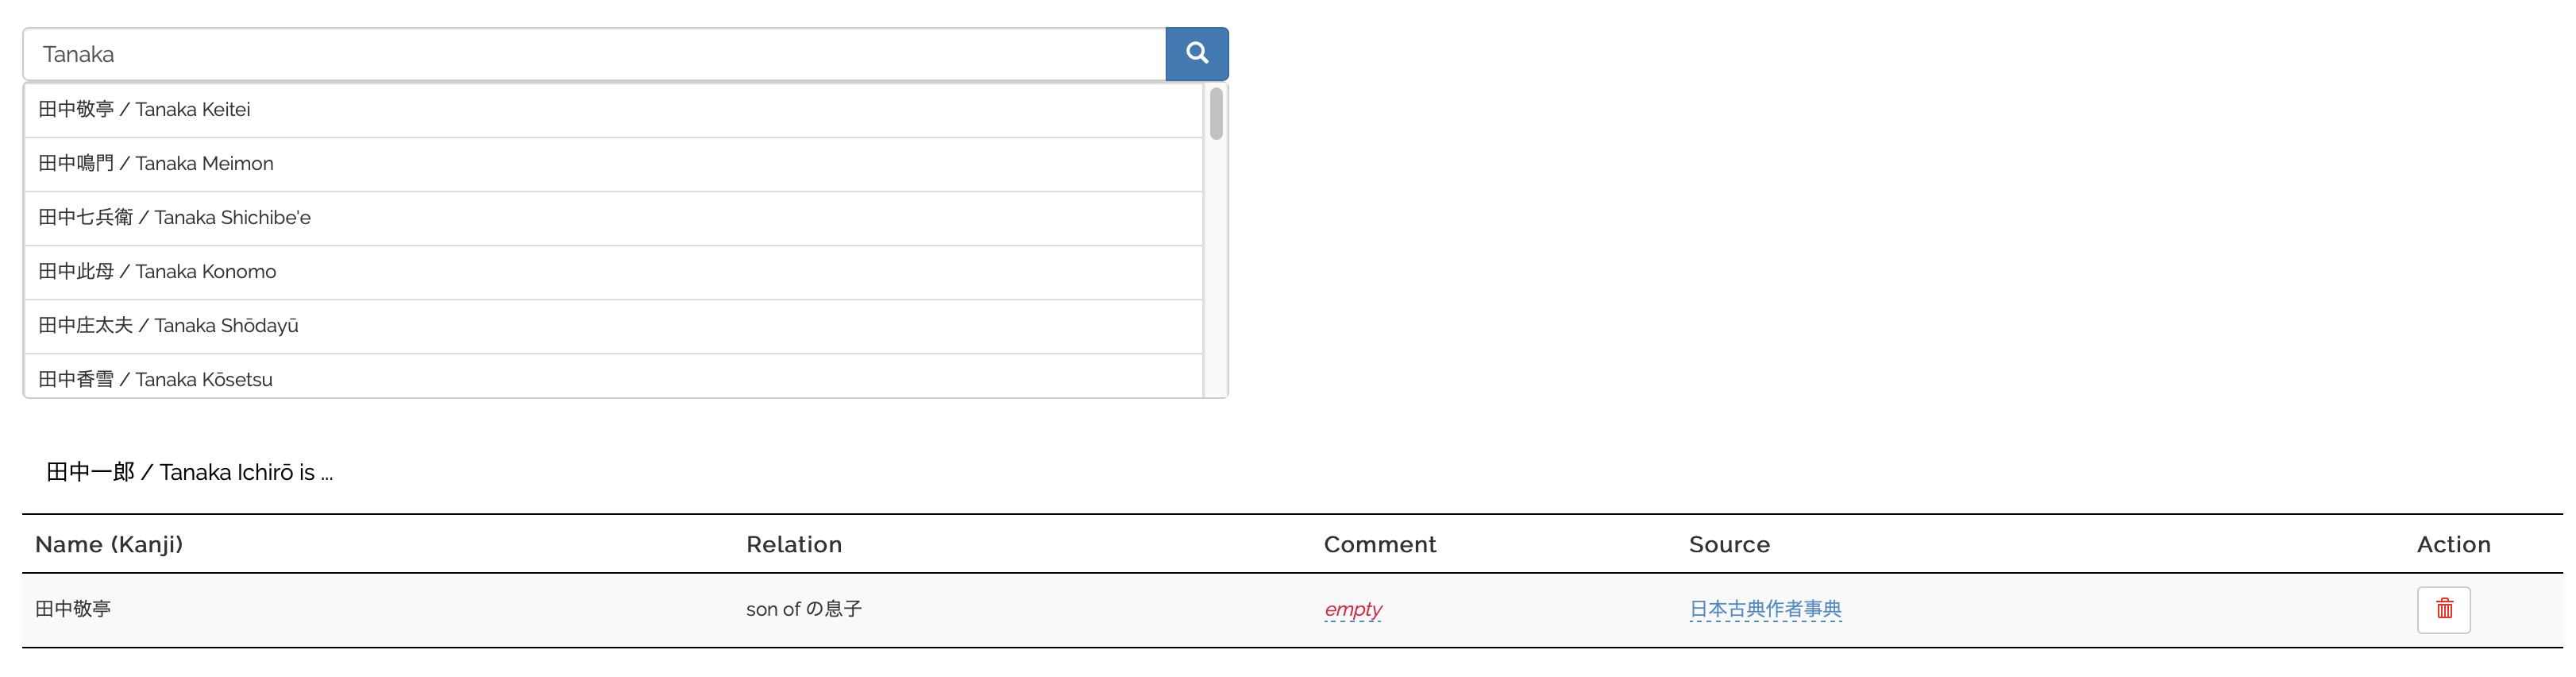
Simply search for a person with whom the current person is related, click on the person, select the correspoding kinship relation and then simply click “Add relation”.
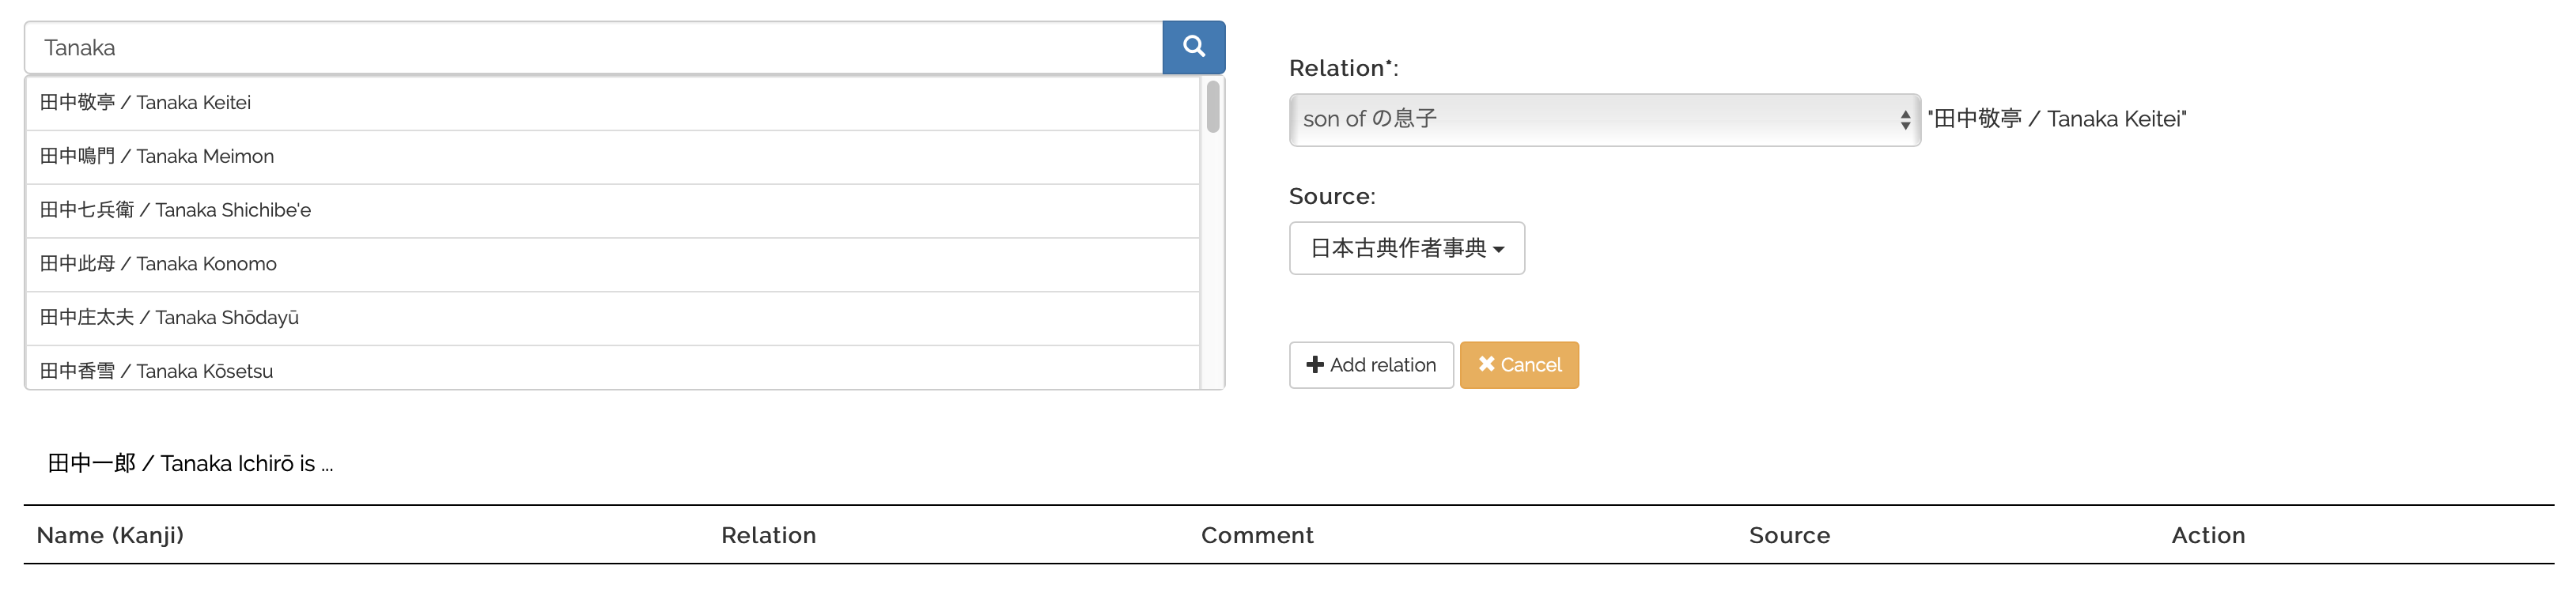
The relation will now be shown in the table at the bottom.
Note that when selecting the relation, or afterwards, you can specify a source as well. The source is optional and for simplicity’s sake, this is limited to one source per relation.
You can additionally leave a comment for any specific relation, e.g. you could use the comment attribute to specify when somebody was adopted.
Once you save this person, the kinship entry will be added to the database.
Note on complementary relations
Note that any complementary relation gets automatically created, so you do not need to do that yourself. For example, since we added the relation that Tanaka Ichirō is the son of Tanaka Keitei, after saving the new person entry the relation that Tanaka Keitei is the father of Tanaka Ichirō gets automatically added as well.
For complementary relations that are gender-dependent (e.g. brother/sister), the appropriate relation is determined automatically by the gender you set in the “Basic information” tab. Note that if gender is set to “Unknown or other”, we default to treating this as “Male” for kinship relations, so that we are consistent in assigning complementary relations.4
Non-kinship relations
The available non-kinship relations are as follows:
- の領家・領主 proprietor/ estate/domain holder of
- の荘官・地頭 estate administrator/land steward of
- の地主・家主・親 landlord of
- の地借・店借・借家人 tenant of
- の主君 lord of
- の家来・家臣 vassal/retainer of
- の主人 master of
- の奉公人・下人・奴婢 employee, apprentice/servant/bound servant of
- の上司 superior of
- の部下 subordinate of
- の先生・師 teacher/master of
- の門下・門人・弟子 student/disciple of
- のパトロン・後援者 patron/sponsor of
- の後援の対象者 beneficiary, incl. artists, scholars, actors of
- の医 doctor of
- の患者 patient of
- の交遊 friend/acquaintance of
- の仲間・同輩・同僚・同門 group affiliation: member of guild; political party; religious group; cultural activity, i.e. poetry, calligraphy, painting, tea, etc.
- の奴隷 slave of
- [奴隷]の主人 master of [slave]
- の雇用者 employer of
- の被雇用者 employee of
The selection of these relations works the same way as for kinship relations. Similar to kinship relations, you can select a source and leave a comment as well.
Important notice
Soon, we will allow for adding dates to (non-)kinship relations. We will update this user guide as soon these changes have been implemented.
Once you are done adding all the information you have on a person, you can save that person’s entry by clicking the “Save” button at the bottom right.
Editing a person
All of the above holds for editing kinship and non-kinship relations for already existing persons as well.
Deleting a person
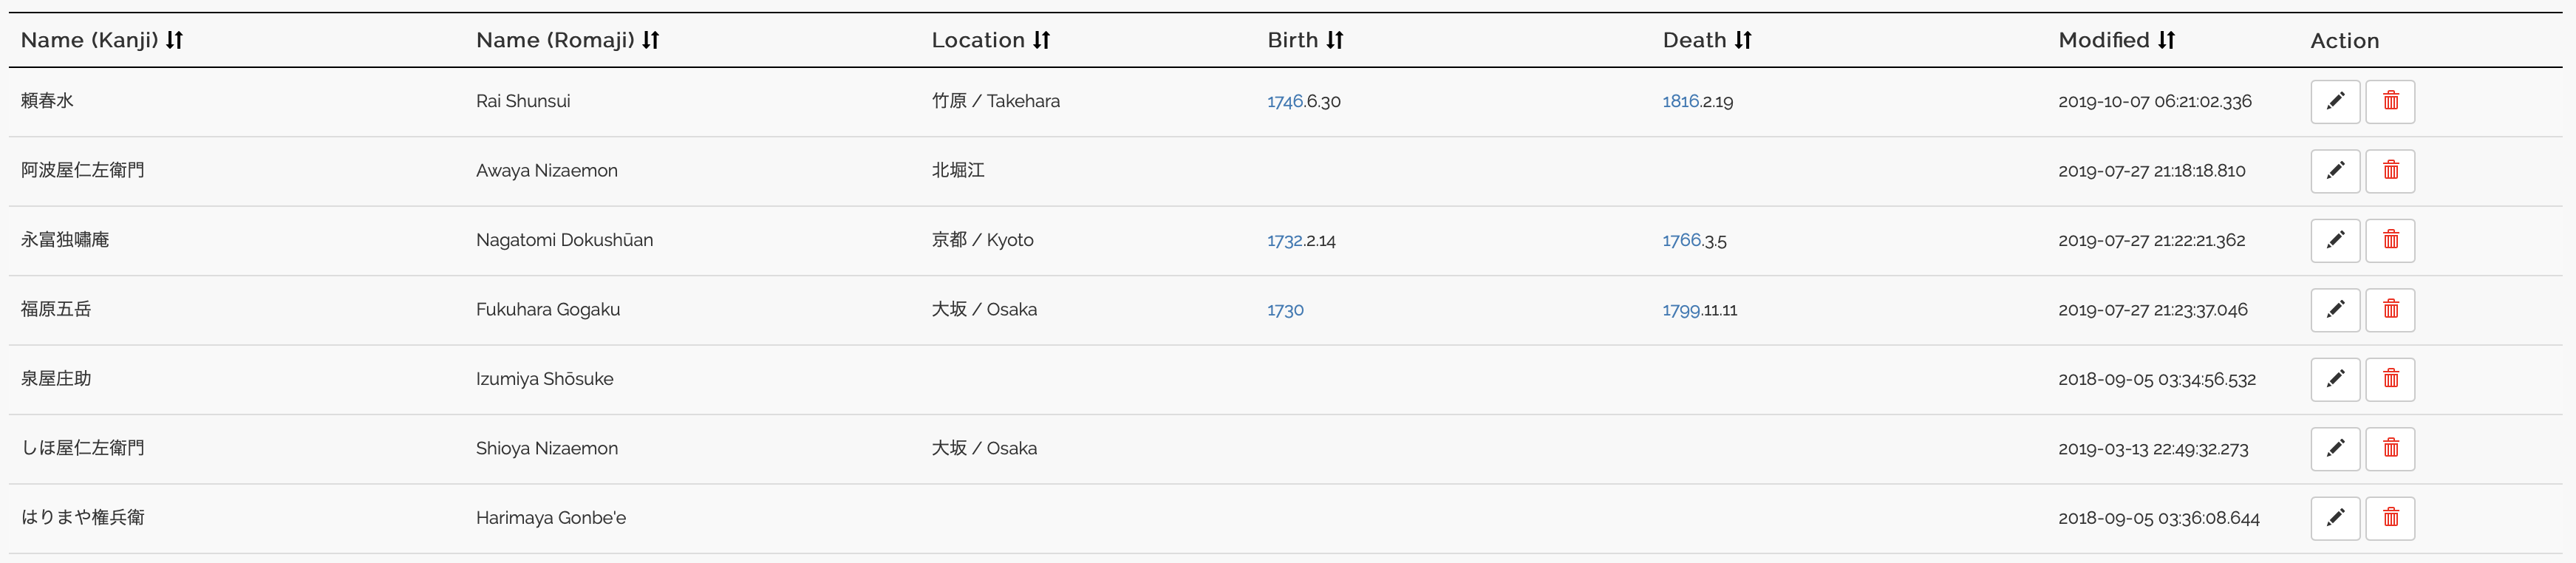
In order to delete a person, you have to click the red trash box button on the right of a person entry in the front table:
Note that you can only delete persons you have access rights to; in most cases, these are persons you have created with your account. Deleting a person requires you to confirm the process:

Once you accept the prompt, the person will be deleted. Along with the person entry, all associated alternative names, kinship relations, and non-kinship relations get deleted. Furthermore, all source attributions for that person get removed from the database as well. Lastly, in all events that deleted person participated in, that person’s ID will be replaced by the [不明] [Unknown] entity.
1. You will also notice that there is an asterisk (*) after some, but not all, of the fields. An asterisk indicates that a field must be filled out in order to correctly save the person in the database. Note that fields that default to a value (such as “不明 Unknown”) can be left untouched if the necessary information is not available or not to be entered.↩
2. Please note that the country/region selection represents modern geopolitical entities.↩
3. Depending on your browser and/or cookie settings, however, you might have to log-in again.↩
4. This is due to the fact that we do not have a generic “child of” relation.↩